僕は普段実行ファイルを配布するだけなので滅多にインストーラを作りません。たまにしか作らないのですぐに作り方を忘れてしまいます。
Installer Projectのダウンロード(初回のみ)
※初回のみの作業です。一度やれば今後この作業は不要です。
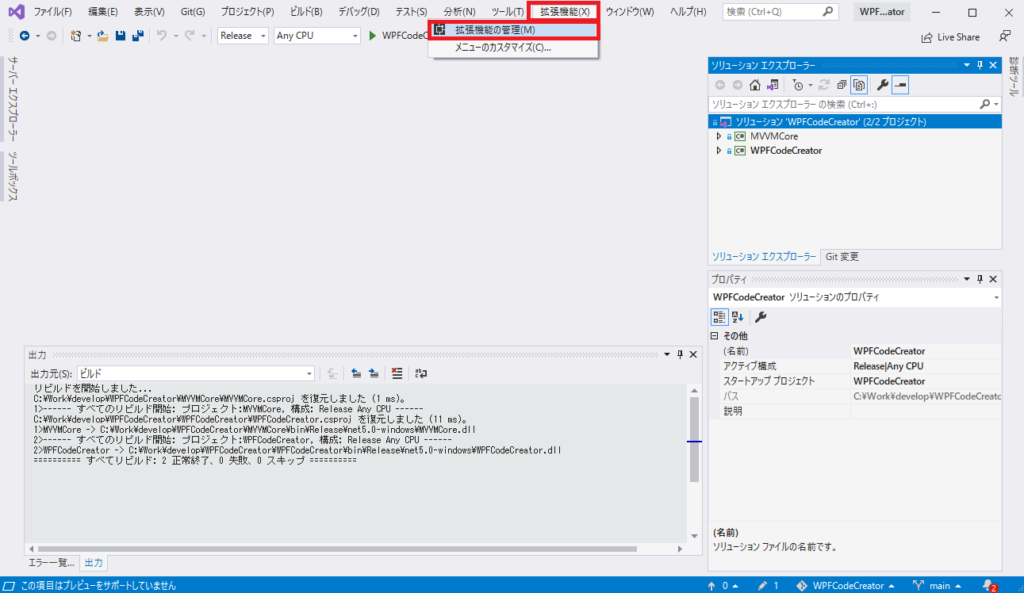
ツール → 拡張機能の管理
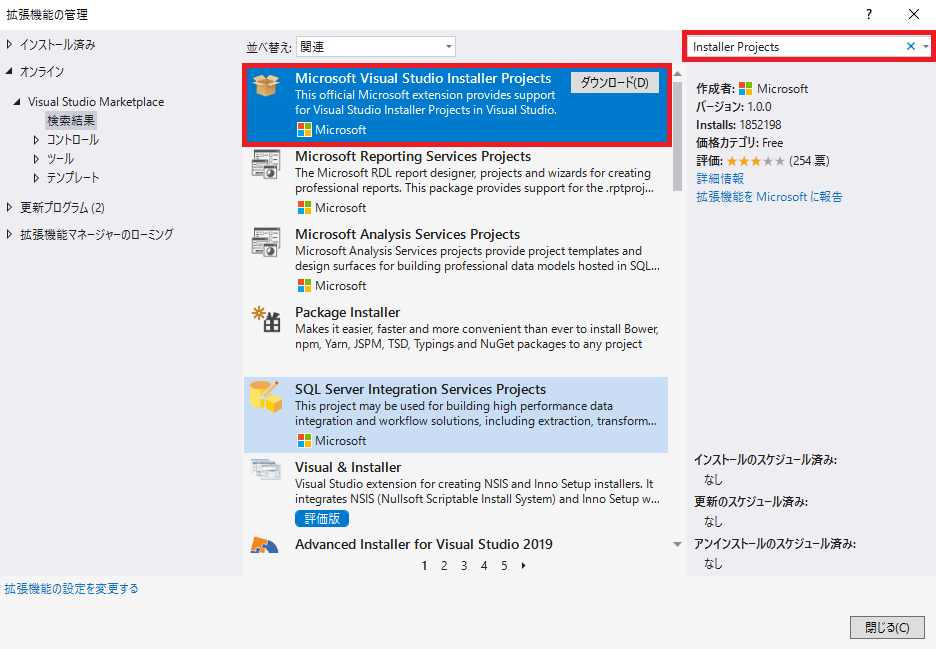
Microsoft Visual Studio Installer Projects を検索ボックスに入力しMicrosoft Visual Studio Installer Projects をダウンロード
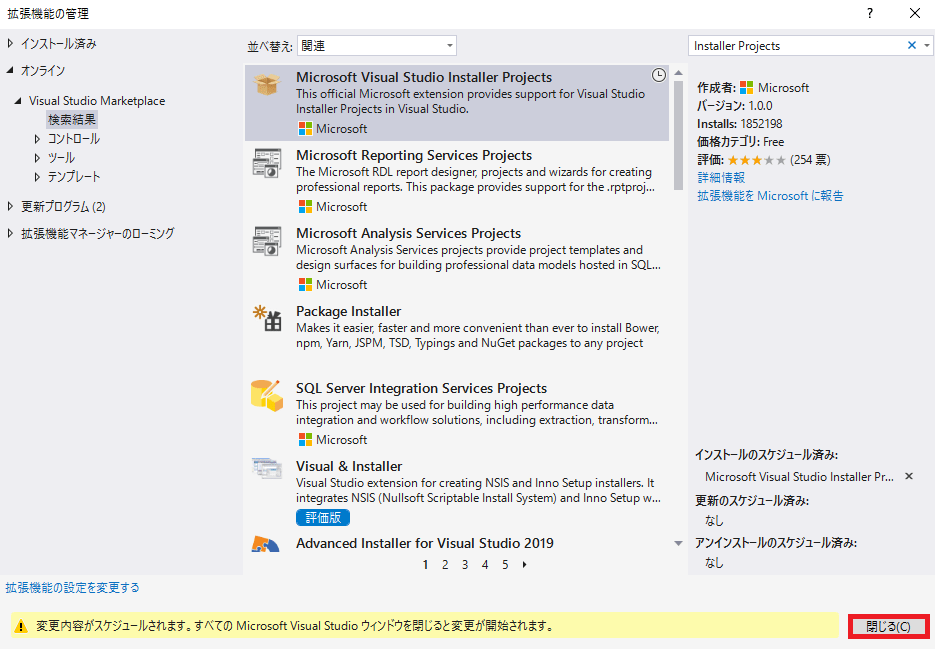
閉じる
Visual Studio自体を閉じてしまう。
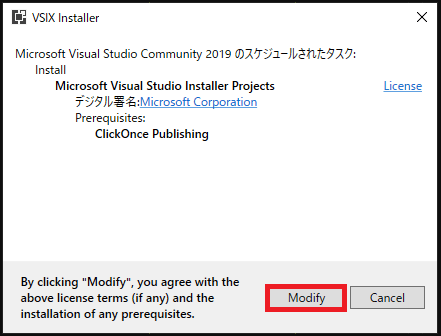
Modeify
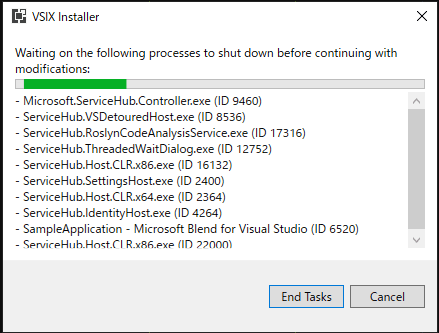
競合するプロセスが立ち上がってるみたいですね。
Visual Studio関連を全て閉じます。
僕の場合、Blendが立ち上がってたので進みませんでした。
ちなみにVSCodeは起動していても問題ないようです。
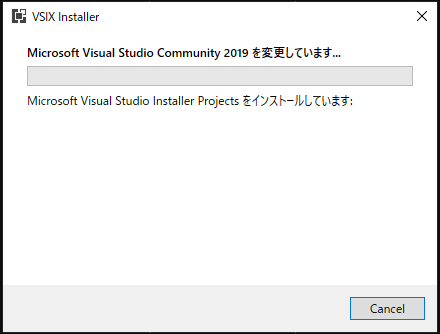
ちょっと待ちます。
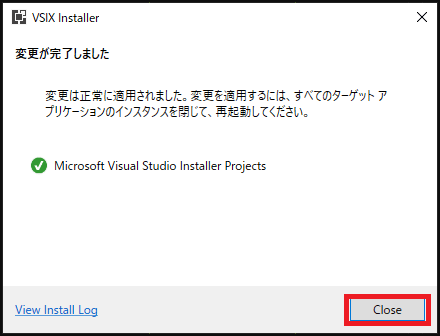
完了しました。
Close。
Installer Projectの作成
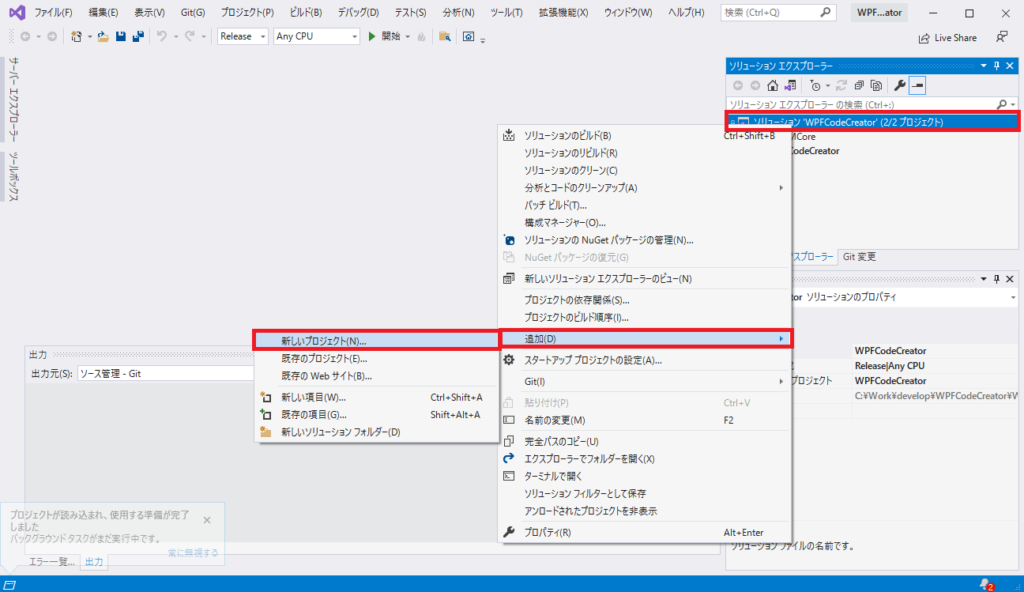
ソリューションツリーのプロジェクトで右クリック → 追加 → 新しいプロジェクト
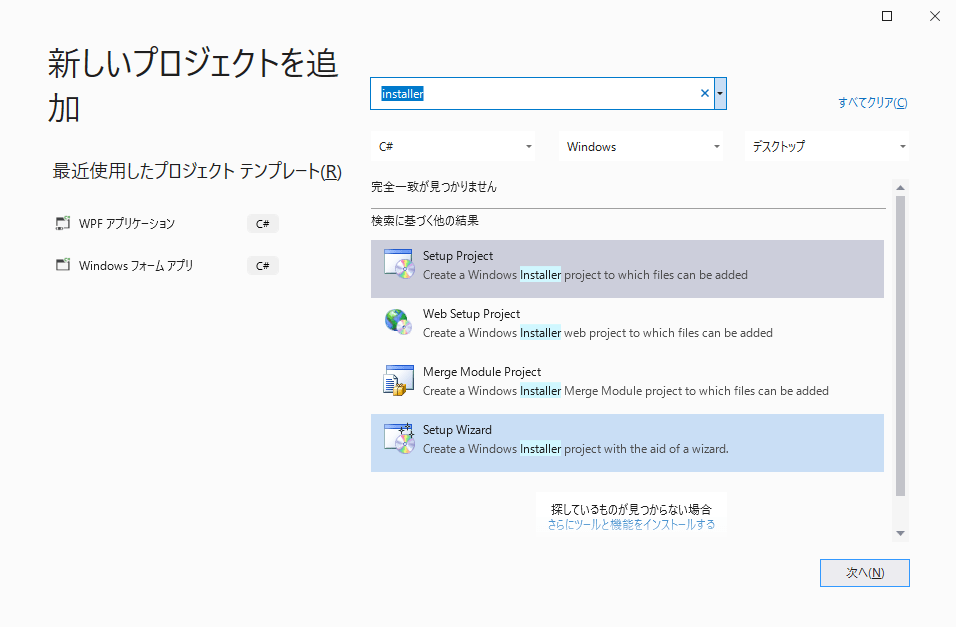
Installerと入力してSetup Projectを選択
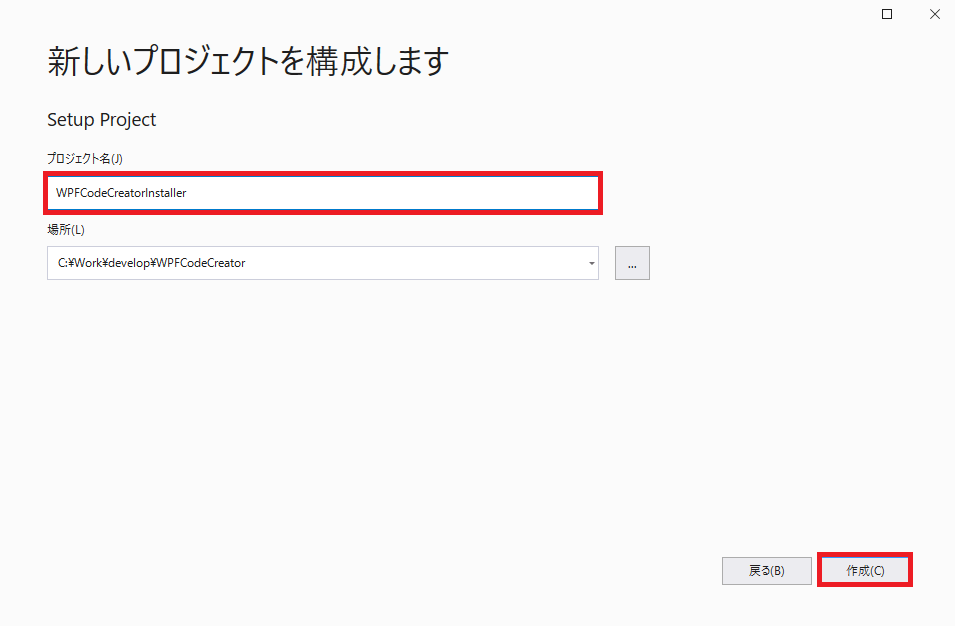
後で後悔しないプロジェクト名をつけ作成。
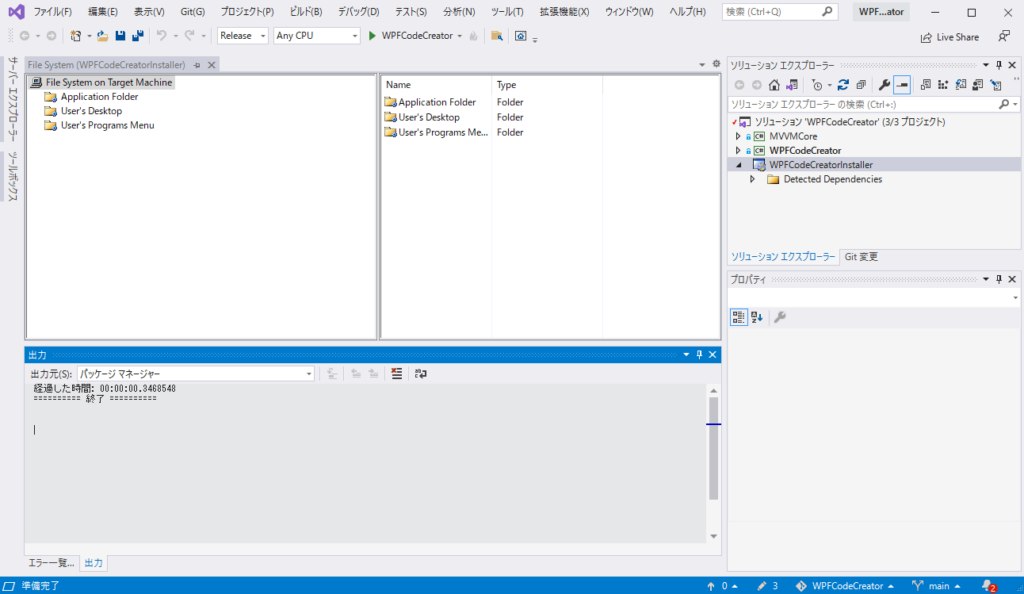
見慣れない感じのものが出来上がりますがビビらなくてOKです。
発行情報を設定
Installerプロジェクトを選択
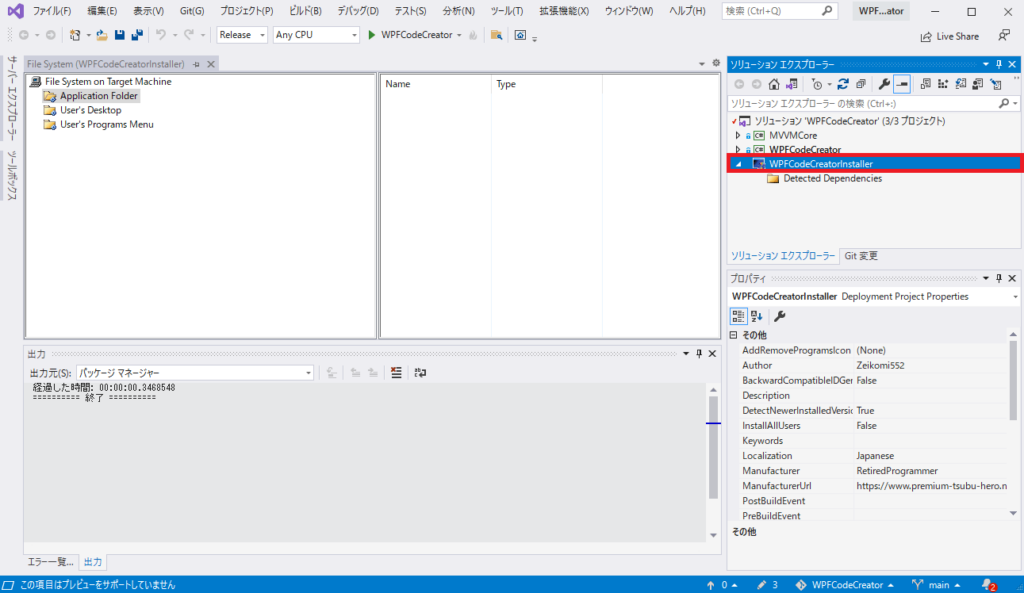
ここの部分を必要に応じて弄る。
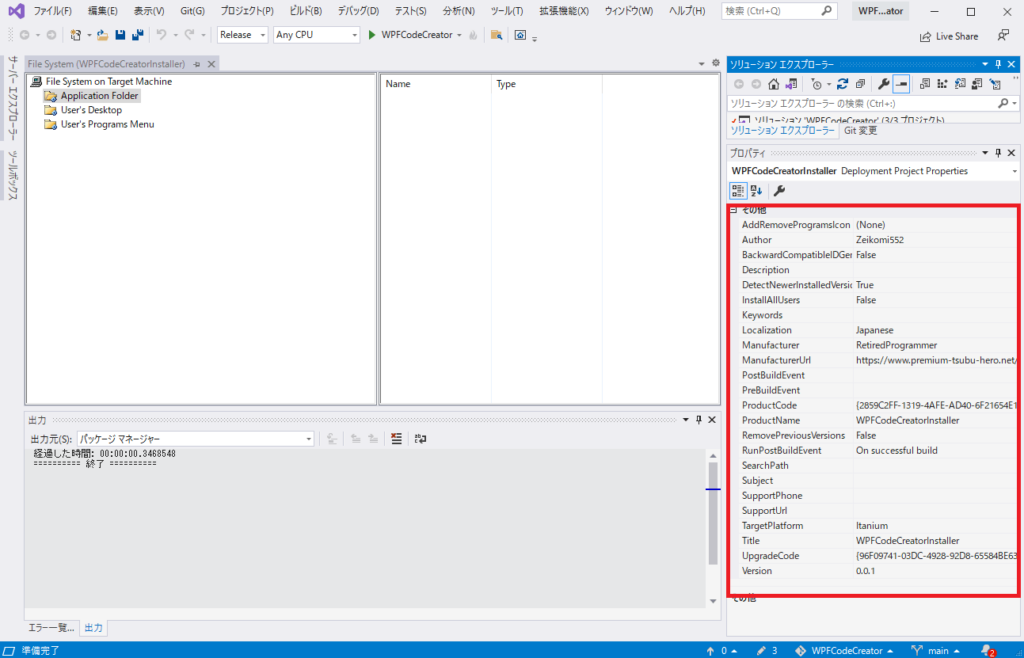
Author,Manufacture, ProductName,Title,TargetPlatform, Versionくらいですかね。
| 表示 | 説明 |
|---|---|
| AddRemoveProgramsIcon | Specifies an icon to be displayed in the Add/Remove Programs dialog box on the target computer ターゲットコンピューターの[プログラムの追加と削除]ダイアログボックスに表示されるアイコンを指定します |
| Author | Specifies the name of the author of an application or component アプリケーションまたはコンポーネントの作成者の名前を指定します |
| BackgroundCompatibleIDGeneration | True specifies Visual Studio 2008(and earlier)ID generation;False specifies Visual Studio 2010 ID generation TrueはVisualStudio 2008(およびそれ以前)のID生成を指定します; FalseはVisualStudio 2010のID生成を指定します |
| Description | Specifies a free-form description for an installer インストーラーの自由形式の説明の詳細 |
| DetectNewerInstalledVersion | Specifies whether to check for newer version of an application during installation インストール中にアプリケーションの新しいバージョンを確認するかどうかを指定します |
| InstallAllUsers | Specifies whether the package is installed for all users or only the installing user パッケージをすべてのユーザーにインストールするか、インストールするユーザーのみにインストールするかを指定します |
| Keywords | Specifies keywords used to search for an installer インストーラーの検索に使用される特定のキーワード |
| Localization | Specifies the locale for string resources and the run-time user interface 文字列リソースのロケールとランタイムユーザーインターフェイスを指定します |
| Manufacturer | Specifies the name of the manufacture of an application or component アプリケーションまたはコンポーネントの製造元の名前を指定します |
| ManufacturerURL | Specifies a URL for a Web site containing information about the manufacturer or an application or component 製造元、アプリケーション、またはコンポーネントに関する情報を含むWebサイトのURLを指定します |
| PostBuildEvent | Specifies any commands to execute after the build ends ビルド終了後に実行するコマンドを指定します |
| PreBuildEvent | Specifies any command to execute before the build starts ビルドを開始する前に実行するコマンドを指定します |
| ProductCode | Specifies a unique identifier for an application アプリケーションの一意の識別子を指定します |
| ProductName | Specifies a public name that description an application or component アプリケーションまたはコンポーネントを説明するパブリック名を指定します |
| RemovePreviousVersion | Specifies whether an installer will remove previous versions of an application during installation インストーラーがインストール中に以前のバージョンのアプリケーションを削除するかどうかを指定します |
| RunPostBuildEvent | Specifies the condition under which the post-build event runs ビルド後のイベントが実行される条件を指定します |
| SearchPath | Specifies the path that is used to search for assembies, files, or merge modules on the development computer 開発用コンピューターでアセンブリ、ファイル、またはマージモジュールを検索するために使用されるパスを指定します |
| Subject | Specifies additional information describing an application or component アプリケーションまたはコンポーネントを説明する追加情報を指定します |
| SupportPhone | Specifies a phone number for support information an application or component アプリケーションまたはコンポーネントを説明する追加情報を指定します |
| SupportURL | Specifies a URL for a Web site containing support information for an application component アプリケーションコンポーネントのサポート情報を含むWebサイトのURLを指定します |
| TargetPlatform | Specifies the target platform of the installer インストーラーのターゲットプラットフォームを指定します |
| Title | Specifies the title of an installer インストーラーのタイトルを指定します |
| UpgaredeCode | Specifies a shared identifier that represents multiple versions of an application アプリケーションの複数のバージョンを表す共有識別子を指定します |
| Version | Specifies the version number of an installer, merge module, or .cab file インストーラー、マージモジュール、または.cabファイルのバージョン番号を指定します |
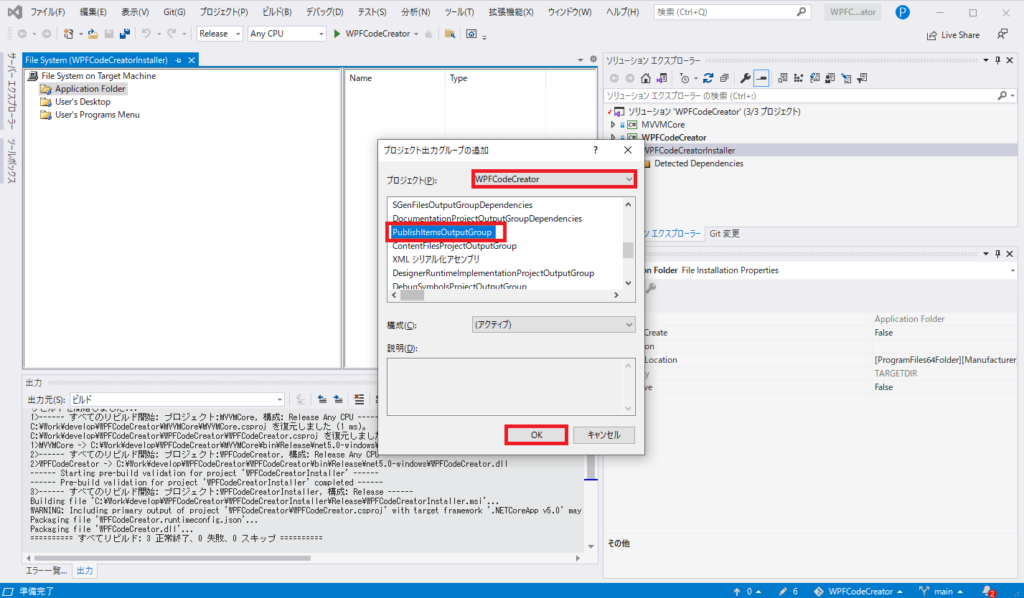
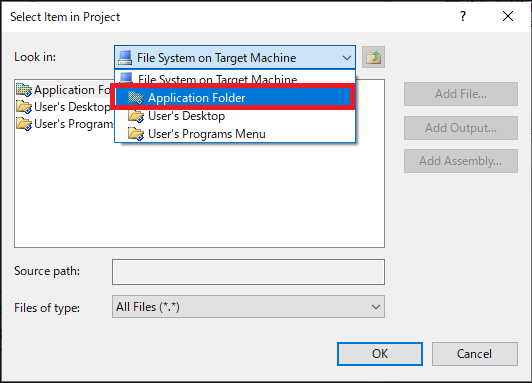
ProgramFiles に展開するアプリケーションファイルの指定
Application Folderを右クリック → Add → プロジェクト出力

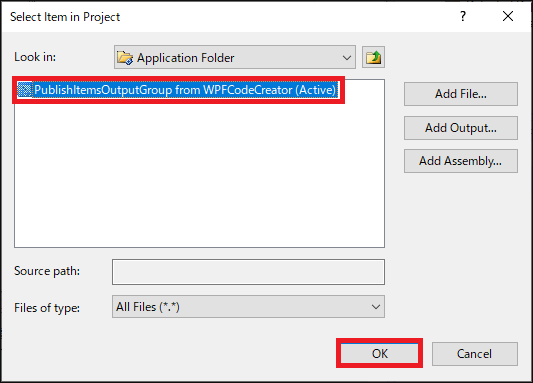
プロジェクトを選択 → PublishItemsOutputGroup → OK
プライマリ出力と言ってるところもありますが、
.NET 5以降ではこちらみたいですね。
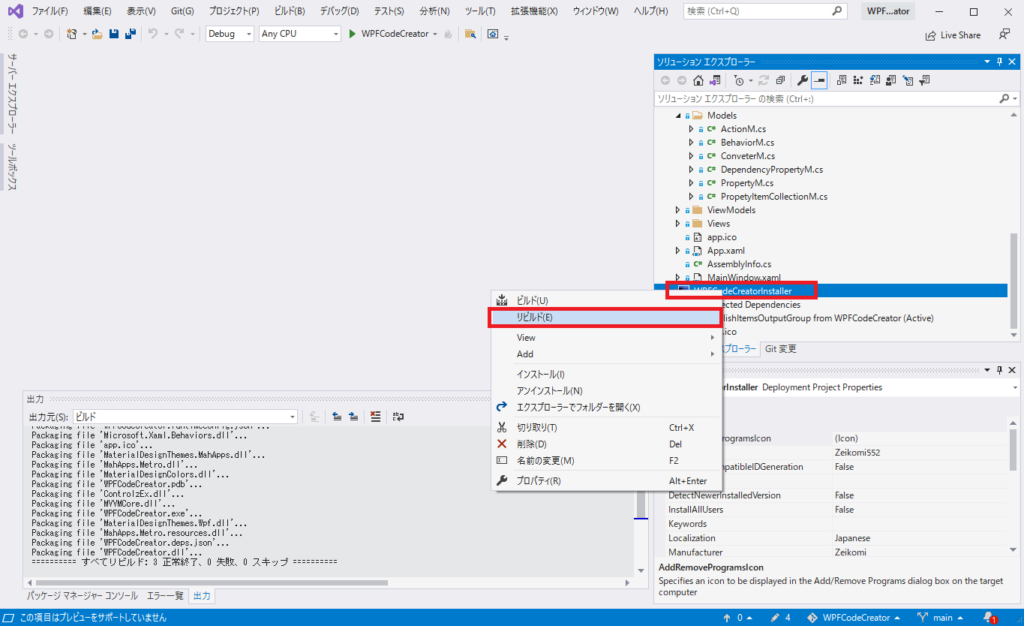
Installerプロジェクトを右クリック → ビルド(もしくはリビルド)
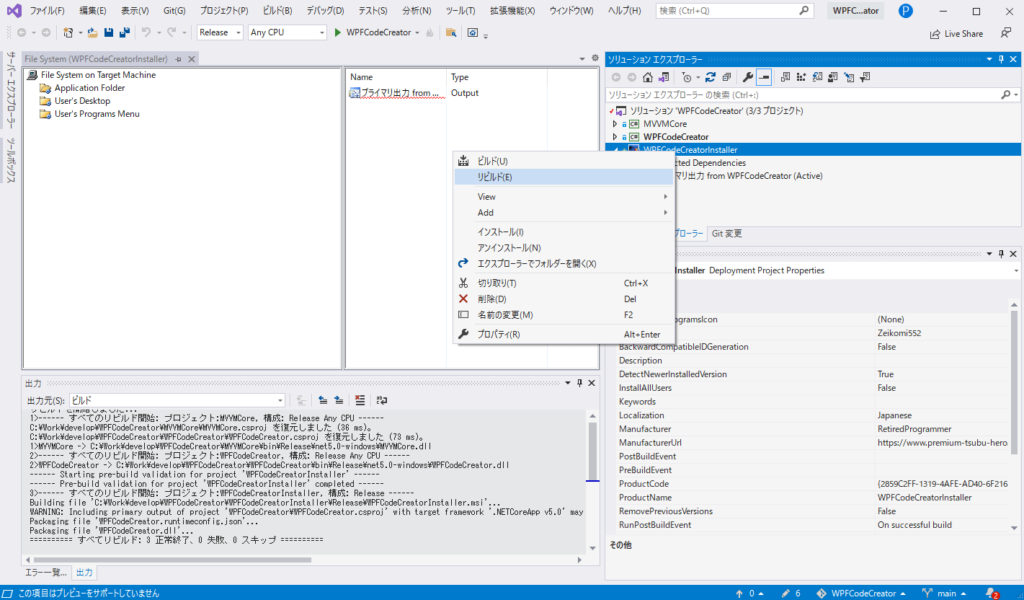
右クリック → エクスプローラでフォルダを開く
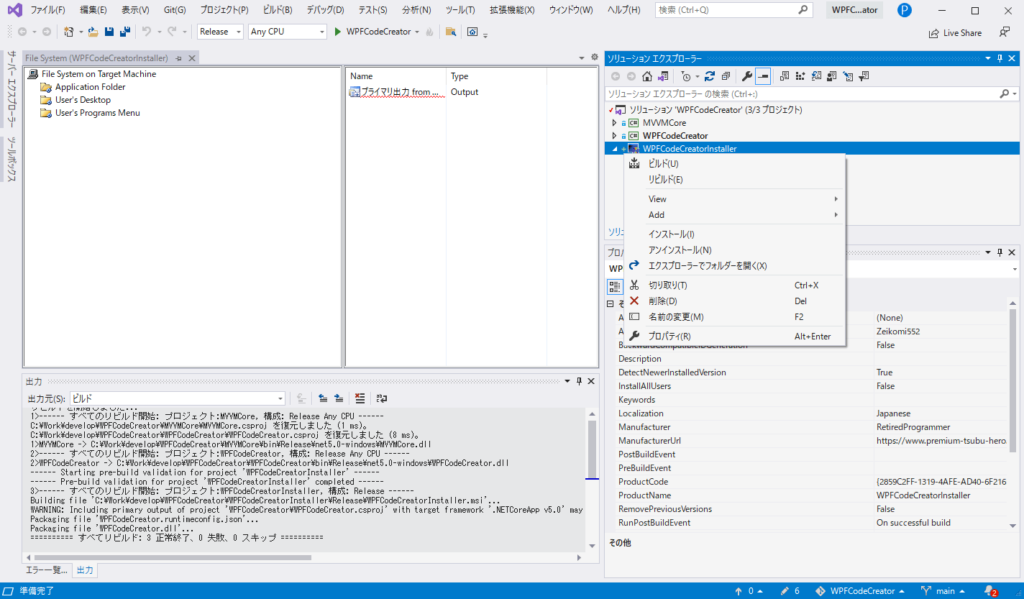
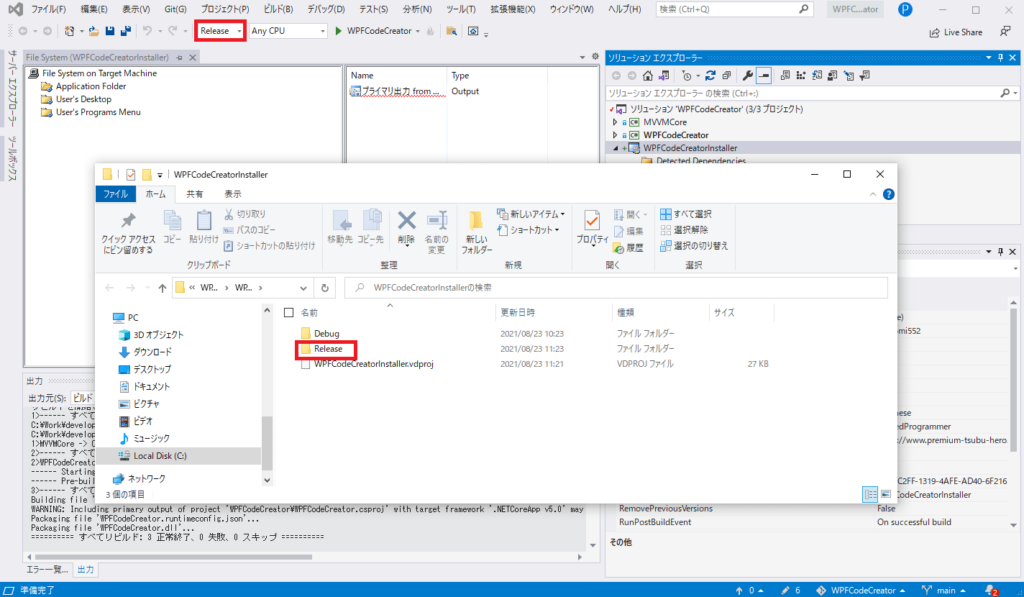
ビルド時の状態を確認してReleaseならRelease,DebugならDebugのフォルダを確認する。
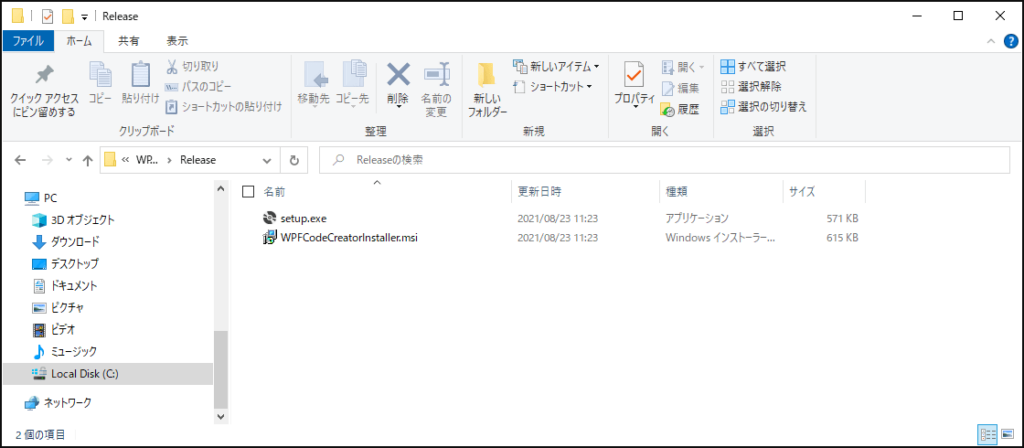
インストーラが出来上がっています。
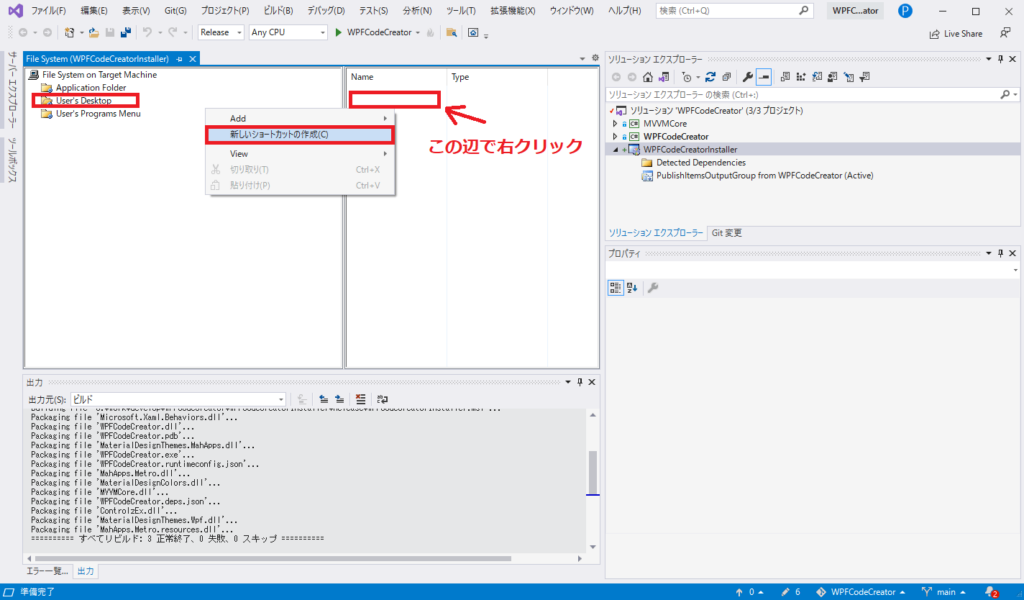
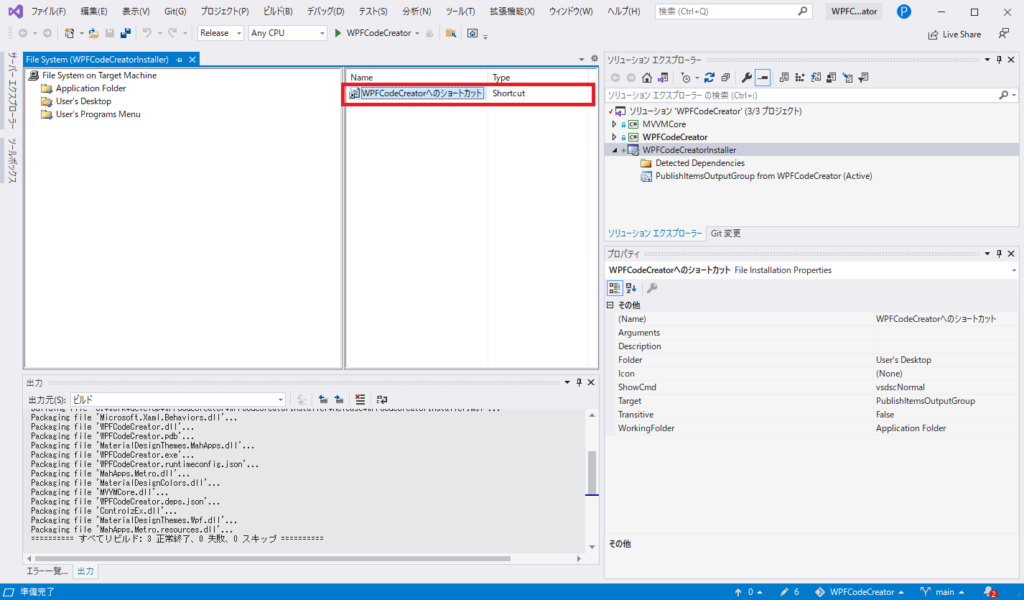
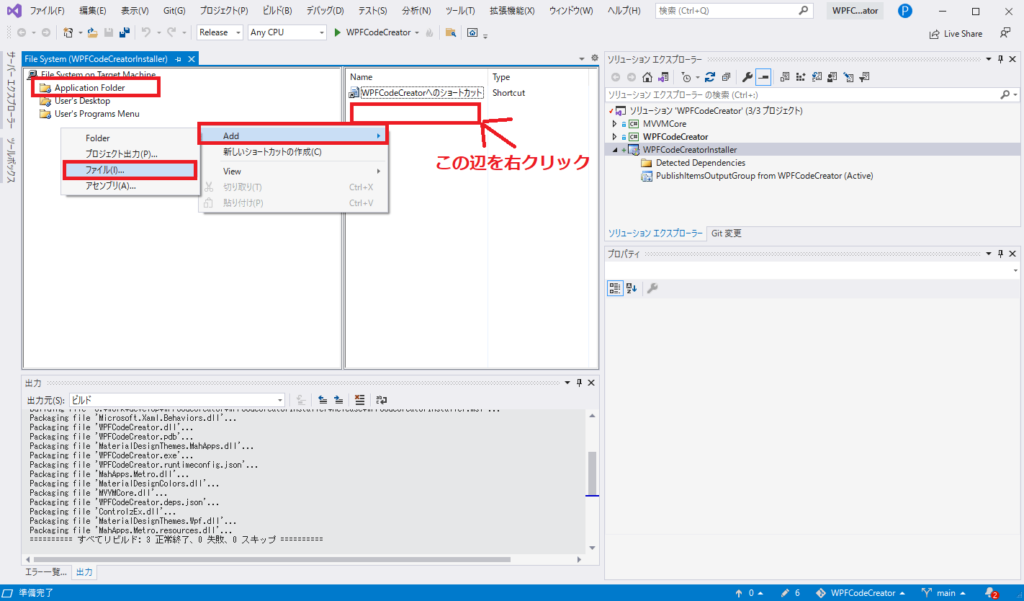
デスクトップにショートカットを自動生成するようにする
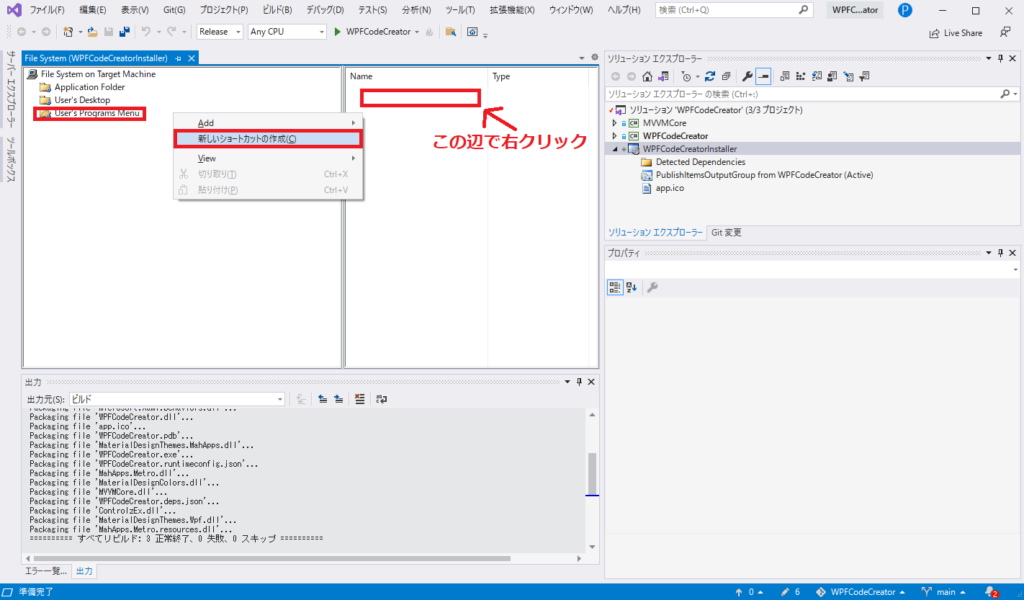
User’s Desktopを選択し右側の白い部分で右クリック
→ 新しいショートカットの作成
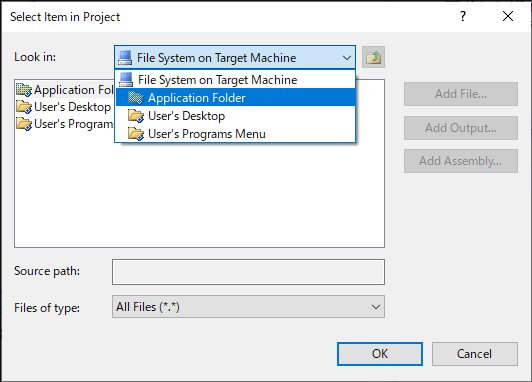
Application Folderを選択
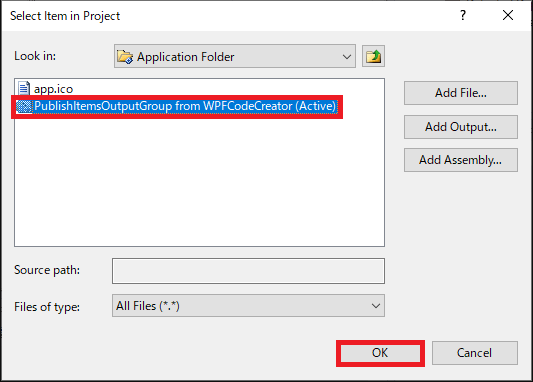
PublishItemsOUtputGroup from プロジェクト名(Active)を選択
ショートカット名を変更します。直接変更できます。
インストールしてみますがアイコンが残念です。

ショートカットのアイコンを変更する
Application Folderをクリック
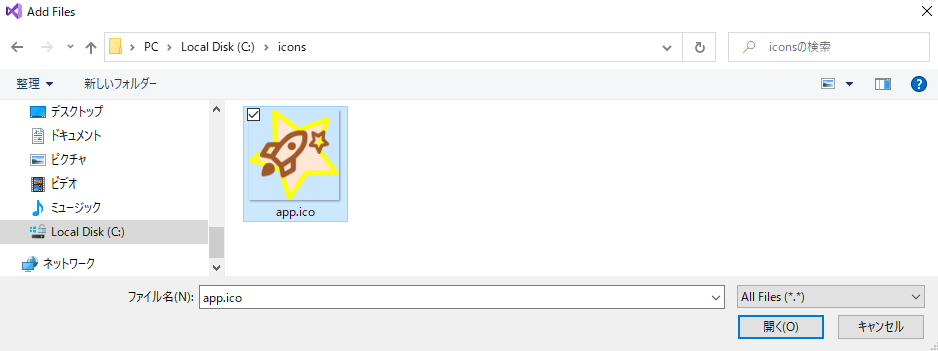
→ 白いところを右クリック → Add → ファイル
任意のアイコンを選択します。
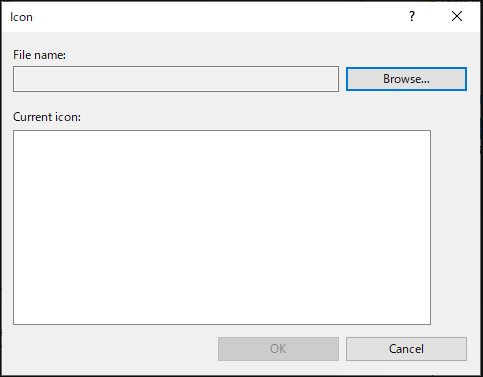
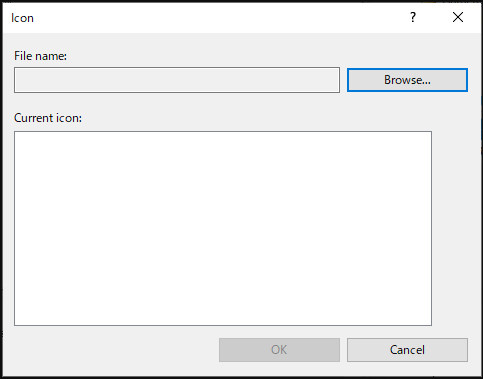
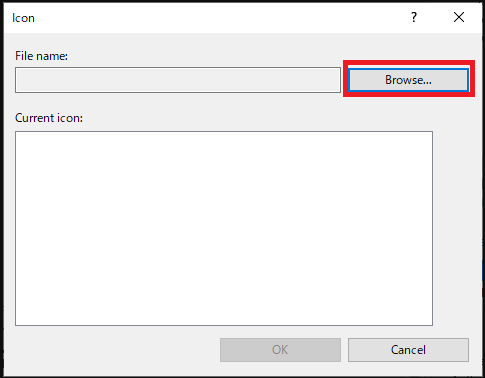
User’s Desktop → ショートカットファイル → Icon → ▼ → (Browse…)

Browse…
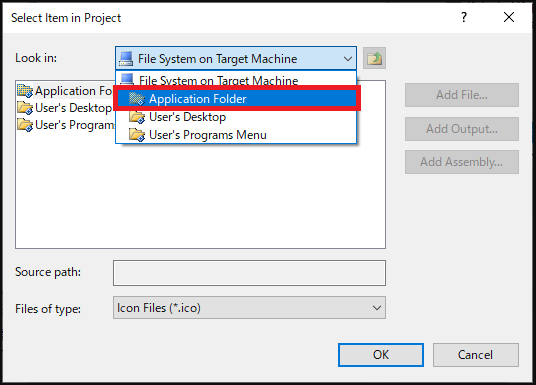
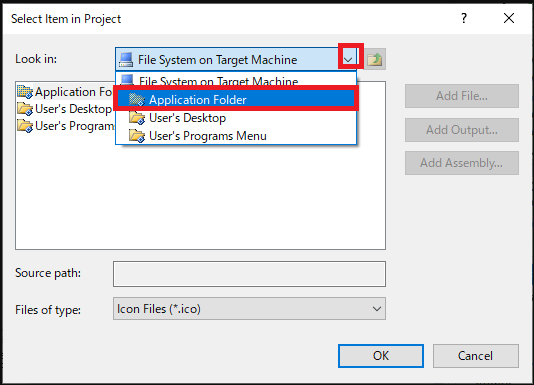
Application Folderを選択
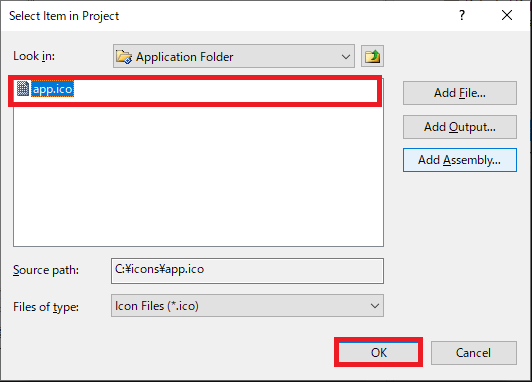
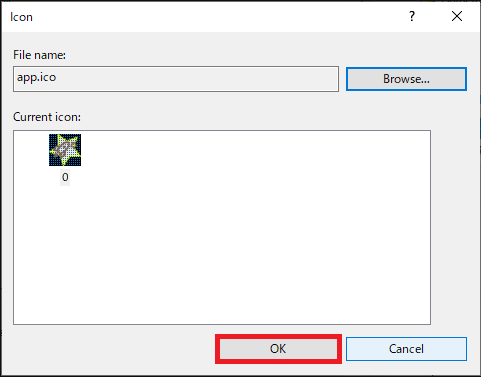
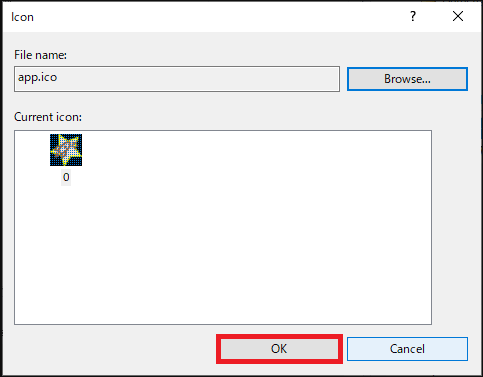
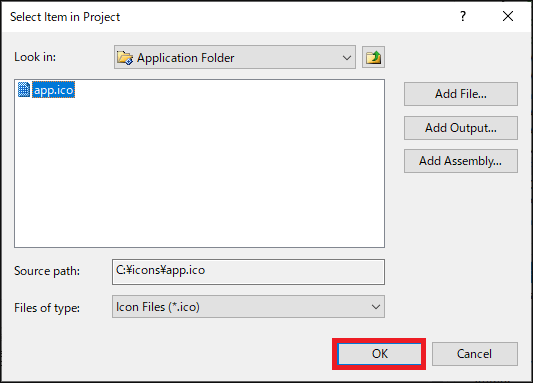
app.icoを選択 → OK
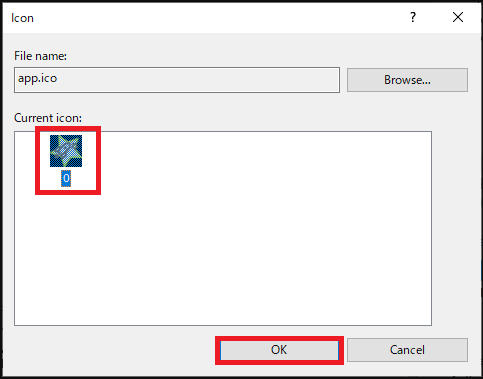
OK
後はインストーラを使ってインストールすればOKです。
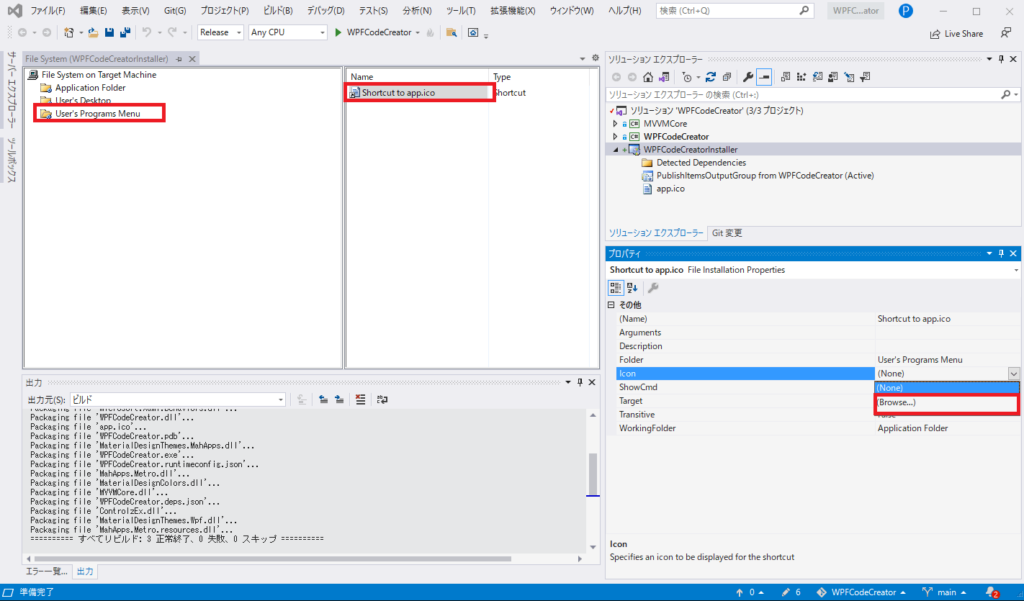
メニューにアイコンを登録する
User’s Programs Menu → 空白の部分を右クリック → 新しいショートカットの作成
Application Folderを選択
PublishItemsOutputGroup from プロジェクト名(Active) → OK
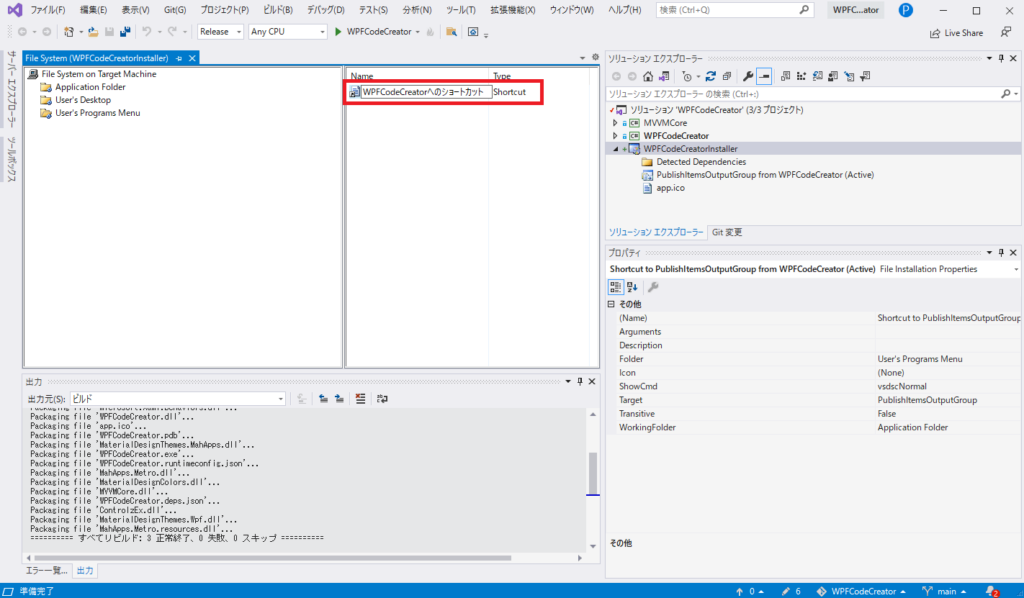
User’s Programs Menu → ショートカットファイル
ショートカットの名前を変更
User’s Programs Menu → ショートカットファイル → Icon → (Browse…)

Browse…
Application Folderを選択 → OK
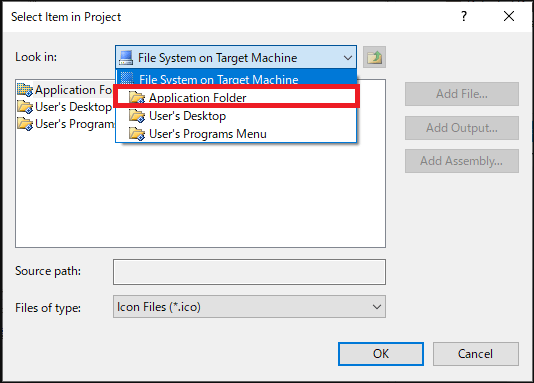
Iconファイルを選択 → OK

OK
インストーラを使ってインストールしてみるとイイ感じになってると思います。
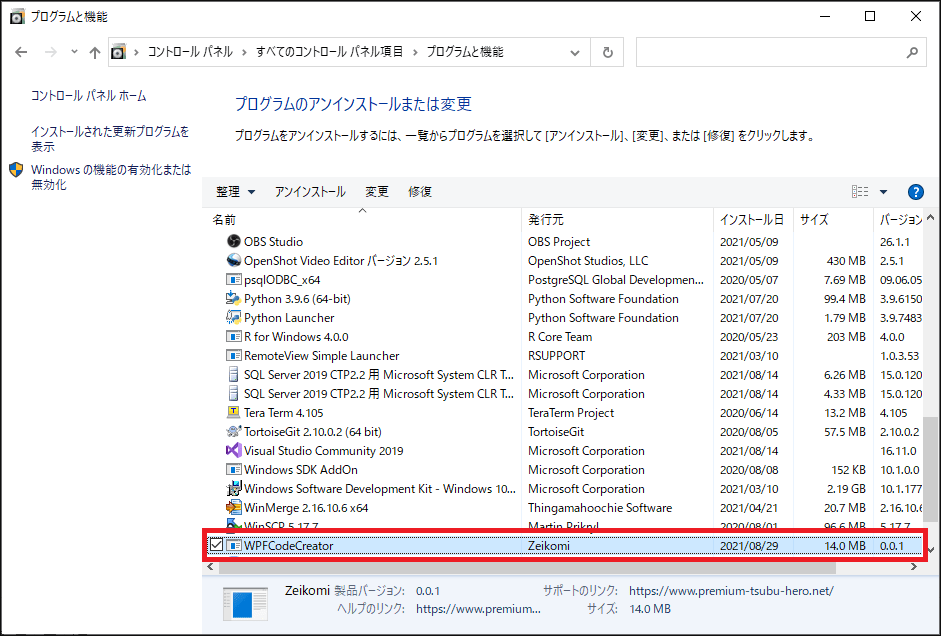
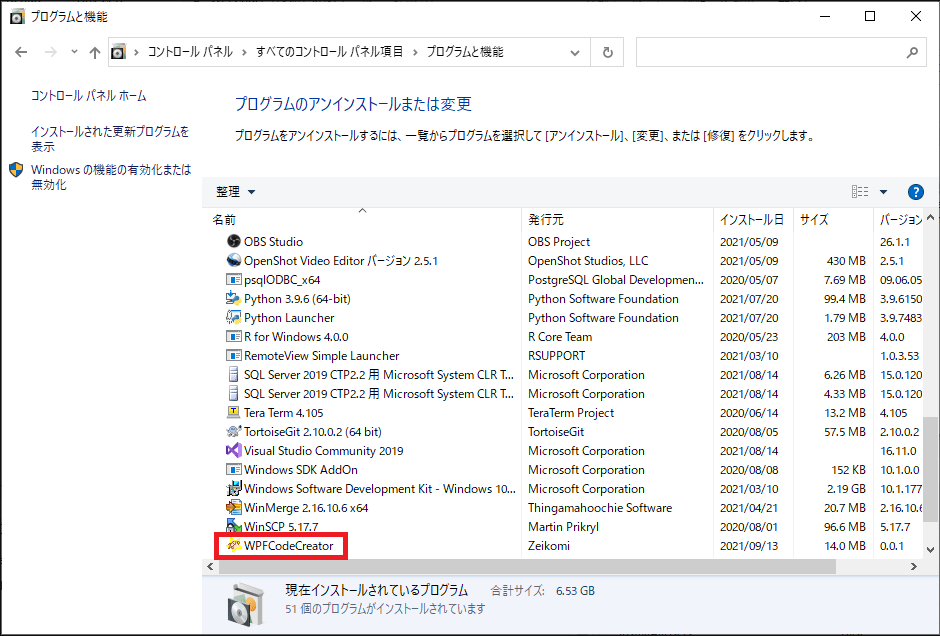
コントロールパネルのアイコン
コントロールパネルのアイコンを確認します。
がっかり感すごし。
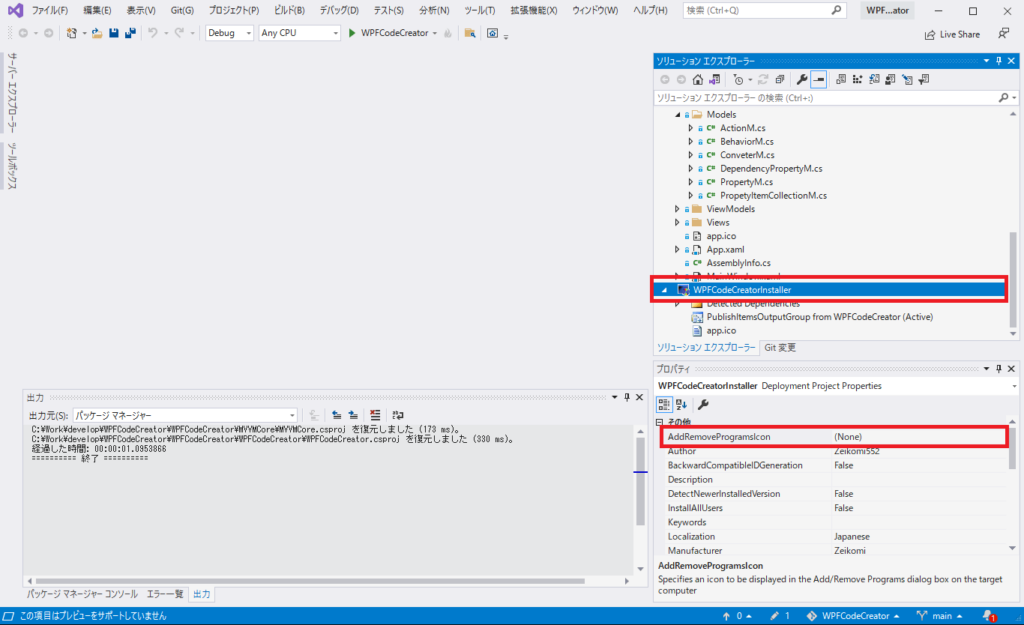
Installerのプロジェクトを選択
→ AddRemoveProgramsIconを選択
プルダウンを開いて(Browse…)を選択
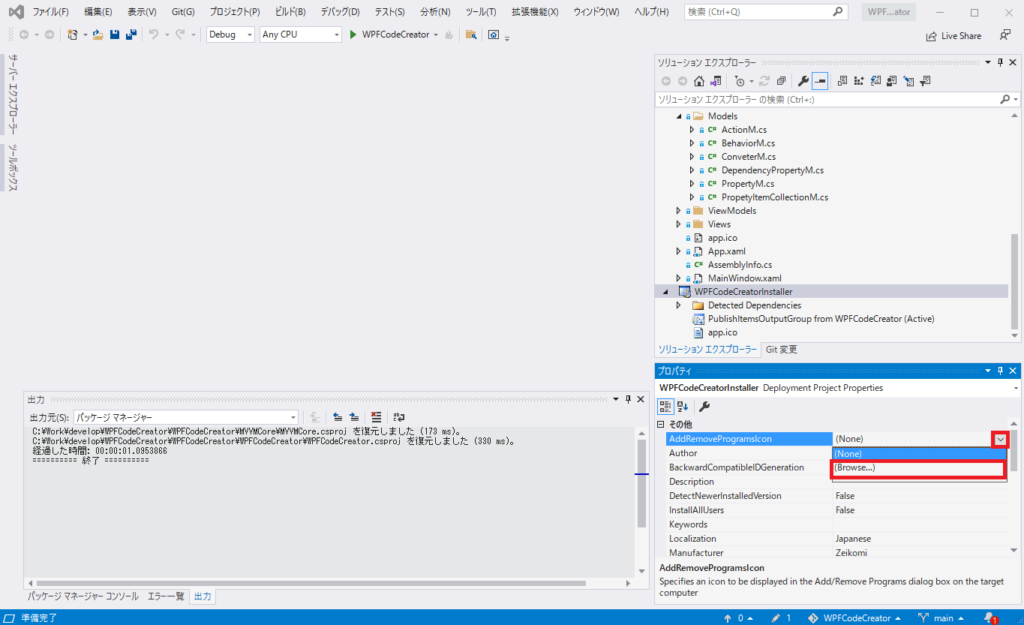
Browse…を選択
プルダウンを開いて Application Folderを選択
アイコンファイルを選択してOK
※アイコンファイルが出てこない人はこのページの”ショートカットのアイコンを変更する”を確認してください。
アイコンを選択してOKを押す。
Installerのプロジェクトをツリーで右クリックしてリビルドを選択します。
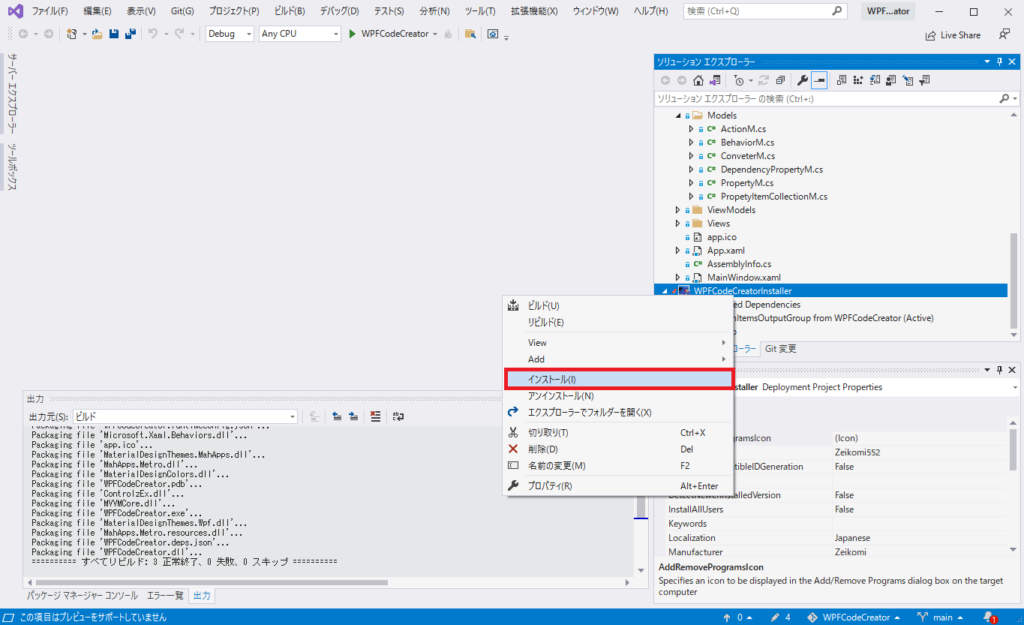
インストーラ使わずにインストールしてみます。
別にインストーラからインストールしても同じです。
コントロールパネルのアイコンを確認します。
うまく行った模様。
お疲れ様でした。
コメントを残す